Simple Neon Tetra Breeding Guide for Home Aquariums
Breeding Neon Tetras aren’t for the faint-hearted, especially if you start with store-bought Tetras. I will guide you through successfully raising your own Neon Tetra fry.
If you have done some research, you will have heard that water conditions and temperatures are very important parts of this process. I will guide you through how to work with the requirements, and through practice, you will be an expert in no time.
The nice thing about breeding with Tetras is you don’t need additional aeration or filters. Adding water daily and making minor changes to the fry later is enough.
Male And Female Neon Tetra Selection (Breeding Pairs)
Neon Tetras reach maturity at around 3 months and can be used for breeding from around then. When you bring Tetras home from the store, they will most likely be sexually mature already and ready to get spawning.
You will have to know which ones are male and female. Males are slightly smaller and skinnier, and their neon stripes appear straighter because of their slimmer bodies. On the other hand, the female appears a bit larger with a rounder belly, which causes her neon stripes to appear curved. A girl has got to have curves.
Once you know how many pairs you will be trying for round one, you can get your things together to start the spawning process. It is best tostart conditioning your Tetras by feeding them baby brine shrimp two or three times a day for a week or two before starting spawning. This will also help you determine males and females better, as the brine shrimp help fatten them up a bit, making the “curves” more apparent.

What You Need To Get Neon Tetras Spawning
If you are going to have a couple of breeding pairs spawning, you can double or triple the required items listed, as the listed items would be for one breeding pair.
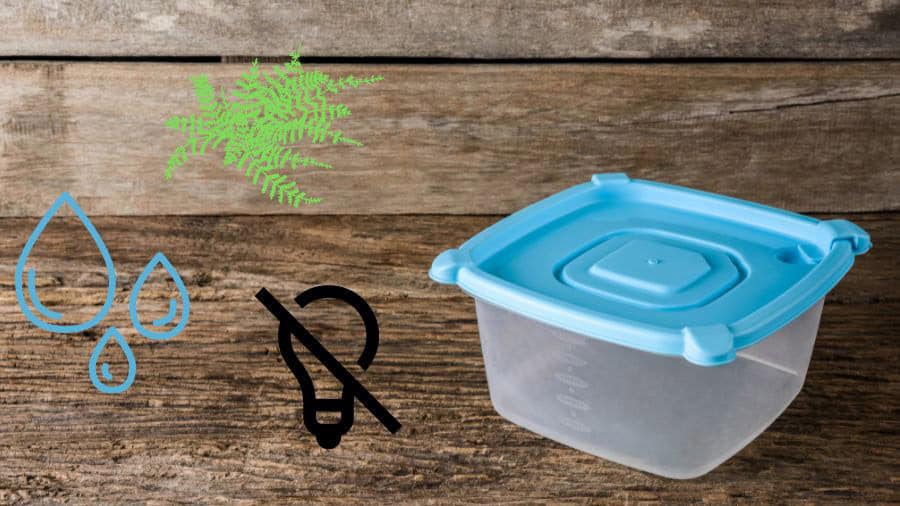
Your plastic tub should provide some visibility (maybe on one side), but if it looks frosted, it would be best to keep light out of it so the pairs don’t see other fish if you keep tubs next to each other. This is important as spawning only occurs in the dark, and the eggs are photosensitive, so you don’t want to expose them to light for prolonged times. Thus, the lid should also be a solid or darker color to help.
You will need a small amount of live plants, a sinking spawning mop, or coco fiber in the tub to ensure the spawning couple’s eggs have something to stick to and also give them the feeling of being more private while doing their private business in the dark (wink-wink)
The ideal water temperature for spawning is about 25 degrees Celcius / 77 degrees Fahrenheit, so make sure the room where you will be doing this maintains that temperature roughly throughout the night until the next morning. You could use your air conditioner in the room to ensure a steady temperature throughout.
After placing the breeding pairs, make sure to have a dark towel to cover the tubs. Also, make sure the pairs can’t see each other. This is very important; spawning will not occur if there is too much light or other fish visible. You can expect anything from 60 to 130 eggs from the female at a time.
What is pure water, you may ask? It is rainwater collected in a clean container (not from the roof or gutters) or reverse osmosis water bought at a water shop. For fry to hatch out, you require low to no TDS levels in your water. So, using pure water ensures your TDS is low without testing the water.
Dechlorinated or tank water from the parents would have TDS levels too high for the fry. TDS (total dissolved solids) is the amount of matter dissolved in the volume of water, such as minerals, metals, salts, etc. Make sure to test the PH levels of the water you will be using for the tubs at around 6.2/6.3.
The Guide To Breeding Neon Tetras In Tubs
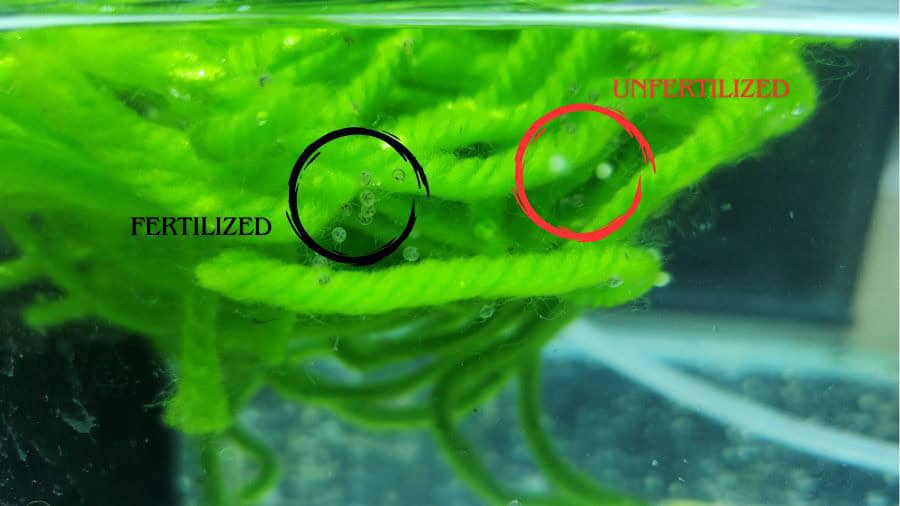
After removing the Tetra breeding pairs from the containers, you will be looking for clear, translucent-looking eggs; those would be your fertilized eggs. If your eggs are milky white, they are not fertilized or older eggs that have been in the female for a while. Always cover the containers with fertilized eggs again after your inspection.
The milky unfertilized eggs you might experience initially are because the eggs are already in the female fish, and they become “old”; the more you do this spawning process, the “fresher” the eggs will be for the fertilization process. The female holds onto her eggs in the community tank because of all the other fish.
Unfortunately, breeding with store-bought Neon Tetras will involve a lot of trial and error. You will have to try and try again, switching pairs around until you are successful. If you are starting the process over with new breeding pairs, you have to start with fresh, pure water.

Fertilized Neon Tetra Eggs
Once your Neon Tetras have successfully spawned fertilized eggs in their tubs and the parents are removed, here are the next steps to ensure you can feed your new Neon Tetra fry and grow them to adults. Once all the fertilized eggs have hatched, you don’t have to cover the containers anymore with a towel, but it’s best to keep the lid over for possible jumpers.
Homebred Neon Tetra fish are of better quality overall and yield better once you start breeding with your homebred babies.
What To Feed Your Neon Tetra Fry
It would be best if you fed your fry from day three when you see their eyes. The diluted egg yolk works best for these tiny fry. You must boil an egg and separate the yolk from the white. The yolk will be food for the fry for the next nine to ten days. I like to break a bit off and keep the rest of the yolk in a small sealed container in the fridge for later use; a little goes a long way.
You will need to get a disposable plastic dropper/pipette to drop the diluted mixture into the tub for the babies. Mix some egg yolk with water in a small container to create a runny, whitish, milky water. This you can suck up with your dropper and drop into each container four times a day (if possible).
I suggest keeping your diluted mixture in the fridge, too, just for safety. After 9 – 10 days, you can start feeding the fry baby brine shrimp 3 times per day. Once the babies are placed in their larger tank, you can feed them what you would feed your other adults. Brine shrimp can be incorporated again when you want to start breeding with them.
