How I Breed Goldfish at Home: Beginner Steps from Eggs to Fry
If you are interested in breeding with goldfish, you must understand the conditions necessary for breeding goldfish. You must select the perfect breeding pair and be prepared for the challenges of keeping your fry happy and healthy.
You will have to set up a clean-cycled tank for the babies to hatch in. I will discuss each topic that needs to be considered before breeding in this easy goldfish breeding guide for beginners at home.
Conditions For Breeding Goldfish
Water temperature plays a significant role in setting the right conditions. You might need to get a fish tank thermometer if you want to plan for your subsequent spawning to occur. Setting “the mood” can be done by increasing your fish tank water temperature by 2 degrees Celsius (35.6 degrees Fahrenheit).
You can wait for this to happen naturally during the warmer months or possibly get a heater for your aquarium. Ideally, you should aim for temperatures between 10 (night) and 21 (day) degrees Celsius or 50 and 69.8 degrees Fahrenheit.
Your fish should also be at an age where they can breed; my fancy goldfish were about one and a half years old when they started spawning, but this can vary based on the fish’s health. A few weeks before, I also included mosquito larvae in their diet, which seemed to make a difference in the number of eggs produced and fertilized.
I keep a water drum outside to collect mosquito larvae for my fish. You can choose any live food for your fish; mosquito larvae were something I had on hand and cost no additional money. It is also essential to identify which fish are male and female and to ensure that you have a male and female you want to breed with.
Breeding Behaviors Of Goldfish
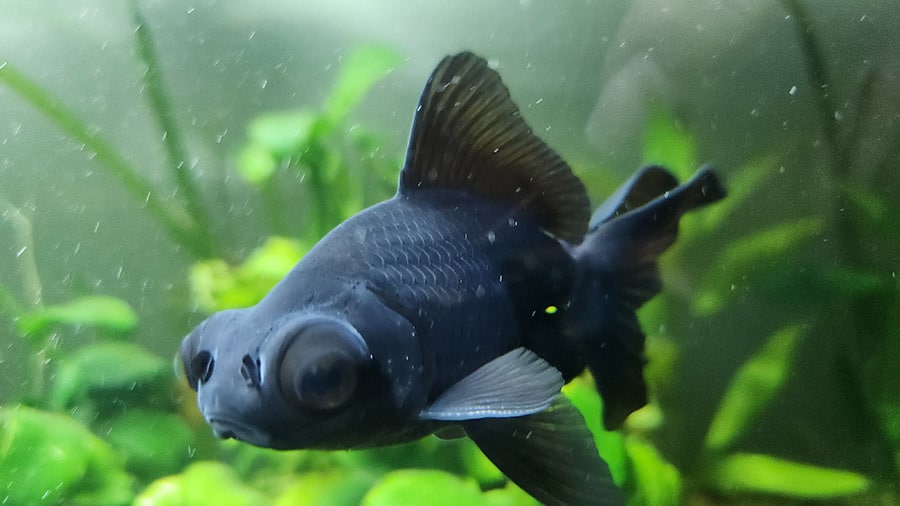
The male or males in the tank will start chasing and bumping the female fish. You would have noticed the female fish showcasing a larger tummy by now. The male fish, when it has reached sexual maturity, would develop white spots on its gills and pectoral fins. These white spots are called “breeding stars” and can sometimes be visible on other parts of their bodies.
Male fish don’t require visible breeding stars to fertilize eggs, but they will most likely be six months or older. Younger female fish will lay smaller eggs, and tiny fry will hatch from the eggs. The older the female fish is, the larger the eggs she lays and the bigger the fry will be when they hatch.
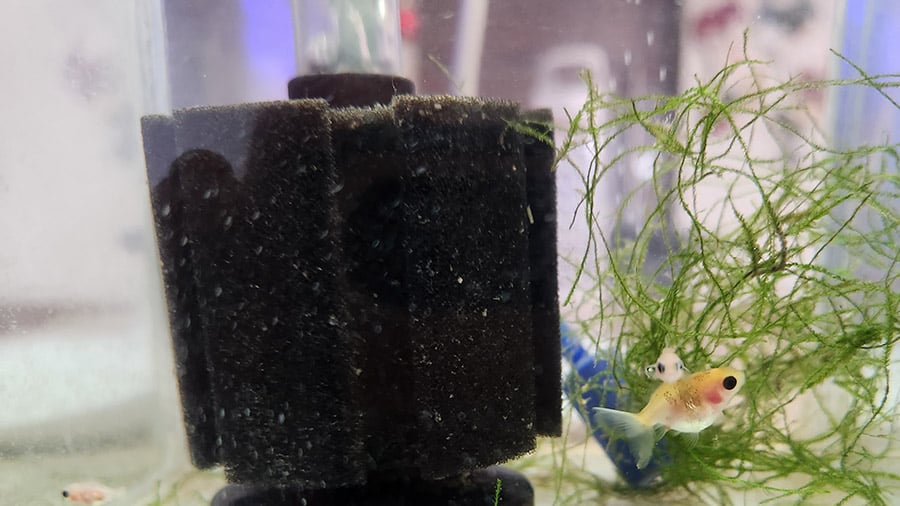
If you separate the pair you would like to breed with to another cycled tank; you can do so in the evening before going to bed, as spawning usually occurs at 4 AM or early morning. You can also leave nature to do its thing and add a spawning mop to your existing tank or choose plants like Java Moss for the eggs to be laid in.
Challenges With Breeding Goldfish
As mentioned earlier about the fish’s age, the eggs’ size will result in larger or smaller fry. The ideal age for your fish to spawn is between two and four years old. Many people advise against spawning with fish older than four years old, as deformities and a weak fertilization rate could be some of the problems you could face.
Goldfish will eat most things that fit in their mouth, including their own eggs and fry. To prevent them from starting to eat all the eggs, make sure that you separate the parents from the eggs as soon as spawning is completed.
During the spawning process, some goldfish varieties can become very aggressive, and injuries can occur. I separated my female fish from the males to give her a break between laying eggs, as she was exhausted. Make sure to provide fish with high-quality food afterward. I always add some booster drops to the tank to help injuries heal if there are any.
My other challenge that I have to mention would be some of my fry growing bigger and faster than others. Why is this an issue, you might ask? Well, remember, if it fits in their mouth, they would try and eat it. So this happened to me. Barry (my one baby fish) grew exceptionally faster than the rest of his siblings, and because I didn’t have a third tank and he wasn’t big enough to go in with his parents, I kept him with his siblings.
By the time I realized what was happening, he had eaten about five of his brothers and sisters. He was evicted from the fry tank immediately and had to join his parents in the big tank.

Goldfish Health
It is essential to choose a breeding pair free from deformities and other qualities you don’t want to pass on to your baby fish. It is best to choose healthy, active, disease-free fish.
Unfortunately, I realized the importance of breeding with the right fish. My female fish was sold to me as a Fantail, and she was very young and small. Only when she started to grow, did I realize her tail was too small for the size of her body. She has beautiful calico colors (some of her babies have inherited), but I hope their proportions will be better than hers as she isn’t the strongest swimmer due to her small tail.
Deformities to look out for are proportioned tails and bodies and split fins that are not caused by injury. Qualities you might want to include when choosing your fish are personal. They could be because you like their color, double tails, or just because you have never had any health issues with the particular fish.
Breeding Goldfish In A Tank Setup
I like to have a ready-cycled tank on one side when spawning is a few weeks away. I do this by filling a new tank with water and then adding fish food to the water. I also make sure to squeeze the filter of my existing tank into the new tank, especially if you are starting fresh with a new sponge filter. I don’t add any substrate to the tank as it makes it easier to clean daily while the fry occupies it.
The sponge filter is a crucial part of this setup, as you require a filter that won’t suck up the new fry. I also include an airstone to ensure the fry gets the oxygen needed to stay happy and healthy. I run this setup by adding a little bit of fish food to the empty tank twice a week to ensure the tank will handle the load once the fish are in and produce waste.
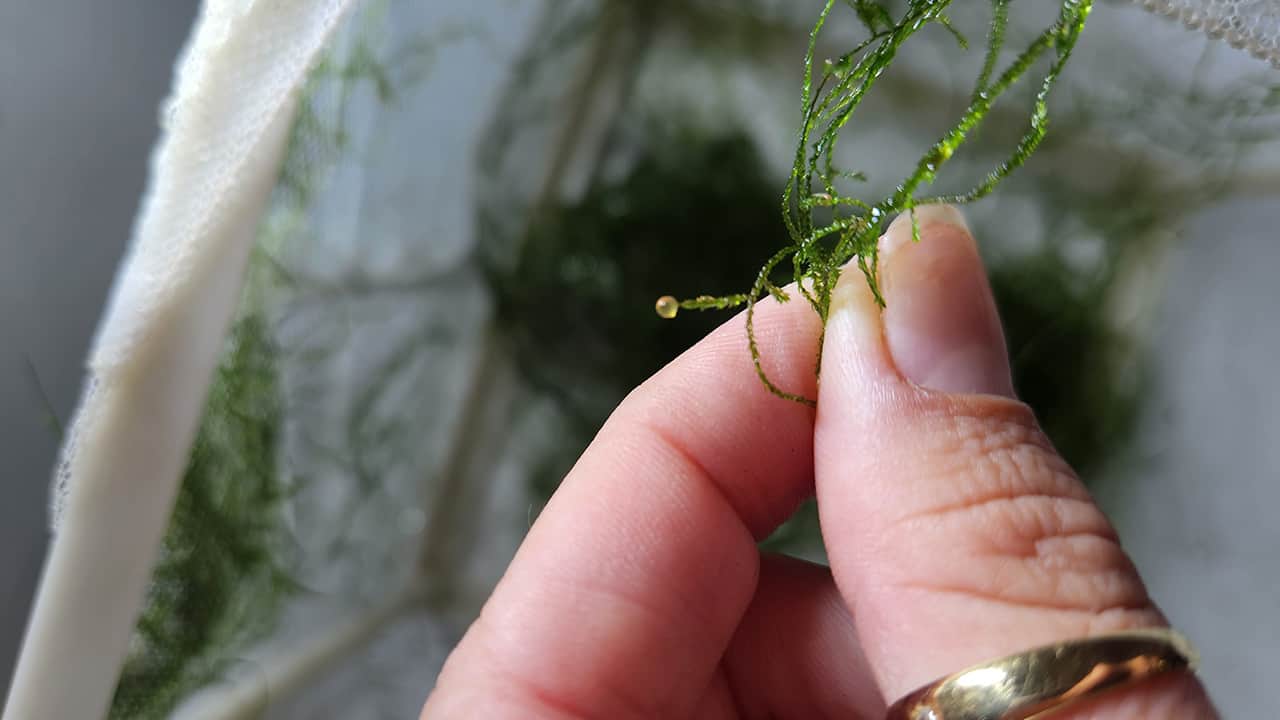
You can decide what to add to your tank for the fish to lay their eggs on. Some people don’t add anything, but I like adding Java Moss (or similar) or making a spawning mop. A spawning mop can easily be made by purchasing acrylic yarn. Just remember to add the yarn into boiling water before adding it to your tank to make sure you get rid of anything unwanted.
You can get a suction attachment for your spawning mop and suction it inside your tank before adding your fish for spawning. Once you spot the breeding behaviors in your main tank, you can move the female and the males to your spawning tank. It is advised that you have more than one male to ensure proper fertilization of eggs; I would say two is more than enough.
Keep an eye on the fish to ensure the female is done laying her eggs. I noticed that my female fish was overwhelmed with the constant chasing, so I eventually added a divider in the tank to make sure she could rest. When I did this, I noticed she laid more eggs, so the eggs do come in waves. Due to the sperm in the water, those eggs also have a chance to be fertilized.
Once the spawning is finished or you are satisfied with the number of eggs produced, you can move the parent fish back into their tank. If eggs were laid on the divider, you can just keep the divider in until the eggs hatch. Due to the sperm in the water, I always change the water, removing about half of the water and replacing it with dechlorinated tap water. I then make sure to add Methylene blue to keep the eggs healthy and free from fungus.
Within a few hours, you will notice that some eggs might turn white while others remain translucent. The eggs that have turned white are the unfertilized ones. Some say you don’t have to remove the unfertilized eggs, but where possible, I remove them. Once all the eggs have hatched, usually after two to three days, you can remove the divider and spawning mop within seven days to be safe.
Fry Development Stages
You will notice that the translucent eggs will form a little black dot, which is the process of fry development. You don’t have to worry about feeding the babies in the first few days, as they won’t start eating yet. Due to their size, they will be challenging to spot in the beginning. I compared my fry to little mosquito larvae-looking things.
Within a few days, you can feed your fry and get food for them at your local pet shop. I incorporated mashed peas for mine, too; they loved it. Make sure to feed only a little bit at a time, and after a while, remove the excess food so the water quality won’t be affected by the food remaining in the water. You can feed them little bits every three hours, as you can imagine; they can’t consume much food at a time due to their size.
I recommend removing about 20 to 30 percent of the water daily and adding new dechlorinated water to the fry tank to ensure the water remains at optimal levels. Removing the old food from the bottom of the tank can quickly be done by using a small silicone tube to suck up all the unwanted food. I used a cut-off piece from my airstone pipe for this task; it works wonderfully.
You will see your fry getting bigger and bigger by the day. As mentioned, a challenge is that some fry get bigger than others and start to eat their siblings. You can avoid this by possibly having another tank as a backup or, like I did for a while, incorporating a breeding net into the tank where I can separate the smaller fry just to keep them safe.